Thursday, July 30, 2009

Hemming and Hawing

In April, I attended a color workshop taught by Ruby Leslie.

In June, I wove the leftover warp and decided to make it into napkins.

In July, I finally hemmed them!!!

Time for me to go on at great length about hemming. I've had trouble perfecting my technique. Feel free to just look at pictures or skip this post all together! I'm just trying to record the things I've tried as I converge on my favorite hemming techniques.

Hems


I've had trouble perfecting my hemming technique.

My machine hems are somewhat crooked and wiggly, but they hold up great to everyday use and laundering.

My hand hems look beautiful, but are time-consuming. Plus, one of the huck towels that I hand-hemmed this winter, had problems with a bit of the hem coming loose within a few uses.

I want to move back toward machine hemming, but I want the hems to look good.

Cutting the ends of my cloth with a rotary cutter to square it up is easier and more accurate than using scissors.

Ways to secure the ends of the cloth:
  • straight stitch
  • zigzag stitch
  • multi-stitch zigzag
  • serging
For this project, I used the multi-stitch zigzag feature of my sewing machine. If my machine has it, yours probably does too!


I switched over to the multi-stitch zigzag disk. I've never used any of these mysterious disks before.


It didn't distort my fabric the way a normal zigzag stitch often does. I think it secures the threads in the fabric better than straight stitching because with a straight stitch not as many of the weft stitches are involved.


Regular zigzag on the left is puckering up a little. Multi-stitch zigzag on the right isn't as puckered. A few other tests are on this same scrap.


Here's my first multi-stitch zigzag on a scrap of the napkin fabric. Good thing it was a practice piece....I was all over the place!

I haven't tried serging yet because of the mixed reviews that weavers I know give their serged edges. Plus, I don't have a serger and don't really want to have to deal with another machine. I know some people swear by it though!

Ways to hold hems in place for sewing:
  • pins
  • Steam a Seam


I am a convert to Steam a Seam for holding fiddly pieces together. I've got the napkin hems secured and folded over ready to sew the hem.

Ways to sew hem:
  • straight stitch by machine
  • stitch by hand
  • straight stitch by machine with walking foot

When I straight stitch by machine, my hems don't come out as even and beautiful as I wish they would. Several people recommended that I try a walking foot for my machine. I bought a general purpose walking foot at Joann Fabrics so I could give it a try.


The walking foot replaces the regular foot on your sewing machine, and has a prong that fits around the screw that holds the needle in place. That prong makes the walking foot advance the top of the fabric, just like the mechanism of your sewing machine advances the bottom of the fabric.

While my hems aren't perfect with the walking foot, they are better. It's easier to get the cloth to behave when the top advances along with the bottom.

The jury is still out as far as I'm concerned with the best way for me to secure the rough ends of my cloth. But the combination of Steam a Seam and the walking foot seem like they'll be great for many sewing jobs, especially with handwoven fabric.

In Summary:

My preferred method for hemming something that will be used heavily and machine washed and dried is to:
  1. Multi-stitch zigzag to secure the fabric
  2. Hold hem in position with Steam-a-Seam
  3. Hem using a walking foot
Told you I was going to go on at length!!

Wednesday, July 29, 2009

Machinery

Some assignments at Digital Photo School are not inspiring to me.
This week's assignment is "Machinery".

Even though I love many of the things machines can do, I don't generally love machinery, find it inspiring, or want to take pictures of it.

So I tried to photograph machines I use and like.....


Cotton Candy at the Park


Sewing Machine


Mixer
(a machine I really do love)


Brake on my Toika Loom
(I love my Toika too!)


Borrowed Cone Winding Contraption

This assignment turned into a fun challenge for me! I was a little surprised at how many of my machines are blue. My car is blue too. Blue is my favorite color - so I shouldn't be too surprised I guess.

Fingers crossed that next week's assignment at the photo school is more inspiring to me!!

Tuesday, July 28, 2009

Computerized Toika Eeva

During my recent trip to WEBS, I was able to photograph and briefly try a computerized Toika Eeva loom.

Just to be super clear, I did not buy a new loom at all this year!! So it was a test drive, but not a purchase!

I'm sharing photos because I want more info about Toika looms online....so I'm doing my tiny part to help make that happen.


Computerized Toika Eeva at WEBS
Note the box that replaces the jacks at the top of the loom, the shafts, and the pedal

When you purchase the computer option for the Eeva, you are purchasing the computerized box on top of the loom, new mechanisms for raising and lowering the shafts, new shafts, the pedal that replaces the treadles, and computer software (Weavepoint). Computerizing other models of Toika looms is done in a similar way.

If you purchase the setup from WEBS, the purchase includes setting it up in your house. (Not sure what the geographical restriction is on that....but the idea of my house 2.5 hours away from their shop didn't phase them a bit.)

From my research online, I've learned that Fiberworks PCW also has Toika drivers, so it can work with a computerized Toika. Also, Woolgatherers Weaving has also successfully fitted this equipment on a loom from another maker.


Switches on the front of the box

The switches on the front of the box control the weaving speed, and allow you to reverse direction if you need to un-weave.


View of the box from the right side of the loom

Where there would ordinarily be jacks, the Texsolv from the box is threaded through pulleys.


View of the pulleys to the right of the box from the center of the loom

Whatever is inside the box raises and lowers shafts by moving the Texsolv that goes through these pulleys.


View from the right of the loom

Note that the two bars that make up each shaft are fastened together with metal, instead of being attached with Texsolv.


Closer view of the ends of the shafts


Texsolv attached to the shafts


Warp beam, back brake, cables attaching to the computer

I'm guessing that one of these cables attaches to the computer and one is probably a power cable.


Front brake, natural linen apron cloth


Pedal that replaces all of the treadles

I didn't have time for an extensive test drive of this loom, but I can say that it was very quiet. It sounded just like a non-computerized loom - no sounds of motors or compressors or anything else. I seem to recall pressing the pedal to open the shed, and releasing the pedal to close the shed - so it felt very natural.

I'm posting these pictures with permission of WEBS, and if you have questions, I can try to get answers to improve this post!! (I will email WEBS once you stump me.....which won't take long!)

Meanwhile, I can dream of replacing the treadles and tie-up of my Toika with this spiffy setup! (Of course, it would be an expensive upgrade....so I'd have to do a lot more research!)

Related posts:
Toika Eeva - without a computer
My visit to WEBS

Monday, July 27, 2009

Laudholm Farm

Geology walk at Wells Reserve

Laudholm Farm was a saltwater farm settled in the early 1600's.

It has been owned by only 4 families and is now preserved by a trust.


The building on the left was an ice house - used before refrigeration.


A chipmunk was making himself at home on the porch.


A Jamesway 120 barn from a catalog. It could hold 120 tons of hay.

This book from 1917 is available in its entirety online and covers Jamesway Barns.

I love weathervanes!

Farmstead including ice house, water tower, and farm house.

Another great weathervane!

Copper beech tree

Beech trees were believed to be impervious to lightning strikes. Studies have shown that they are less likely to get struck by lightning than oak trees.....but still, to be safe, "When thunder roars, go indoors!"


Looking back toward the farmstead with the copper beech in full view

Glacial moraine (A deposit of glacial debris)


Glacial erratic (large boulder dropped off by a glacier)

New England was scoured by glaciers during the most recent ice age. The ice melted approximately 11,000 years ago.


Bayberry and Honeysuckle

Honeysuckle is an introduced species, native to Europe.

Bayberry leaves have a fragrant scent. When homes had dirt floors, settlers would bring crushed bayberry leaves indoors to make their homes smell nicer.

Bayberries were used to scent candles made primarily from tallow.


Blueberries!


Sapsucker holes

The horizontal lines of holes in this branch were made by a yellow-bellied sapsucker. Despite its name, the sapsucker actually feeds on insects. It drills holes to produce sap, and then feasts on the insects that are attracted to the sap.


Tree with Sapsucker Holes


Salt Marsh

The brackish water (part fresh, part salt) in this salt marsh provides important habitat.

Like Cogswell's Grant, Laudholm Farm was originally established to exploit the salt marsh.


Dune Grass, Cobbles and Sand

Kicking into geology gear all of a sudden:

Beaches in New England are typically an underlayer of peat, covered with cobbles, and then covered with sand. (Well, the rocky beaches often omit the sand layer!)

Maine has approximately 2500 miles of coastline (if you smoothed the whole thing out), and about 50 miles of sandy beach.

The peat is from when sea levels were lower thousands of years ago, when the salt marsh zone extended farther out than it does today. Due to the relatively cold water, the peat is preserved. Farther south, the peat disintegrates faster, so it is more unusual.

The cobbles are washed in by winter storms, and the sand is re-deposited in summer and partially washed away in the winter.

The cobbles and sand were originally part of the White Mountains (the main mountain range in NH and Maine). Glaciers eroded these materials from the mountains and washed them into the Gulf of Maine where the currents continue to move them around and sort them.

Have you ever noticed how sometimes when you're beach-combing you find groups of similar shells in the same area? That process is called "water sorting" and it happens with rocks and sand as well. Water sorting is why some beaches have very fine sand and others have coarser sand.

The Geology Walk is repeated monthly at Wells Reserve, so if you want the full scoop, please visit them!!! I definitely did not do the 3 hour walk justice in this post!!

Sunday, July 26, 2009

Dog-Friendly Lobster

Looking for a dog-friendly restaurant with great lobster in southern Maine?


Chauncey Creek Lobster Pier is our favorite!!


View of the pier from the street

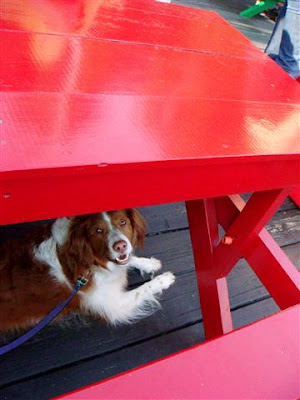
After a short wait, we ended up sitting at the red picnic tables in this picture - two couples, two dogs, how many lobsters?


Bailey is ready to catch anything we drop!


Bailey and his best friend Hobbes are popular with people of all ages at the restaurant. They even get served a water bowl before we get any food!


I almost forgot to take a picture of lobster before it was devoured!


To round out the day, we stopped by Annabelle's for ice cream in Portsmouth, NH where we ate with great views of the tugboats!

Definitely a great day for dogs and humans alike!

Saturday, July 25, 2009